How to Repair a Leaky Faucet: A DIY Guide
A dripping faucet is more than a minor annoyance; it can lead to increased water bills and unnecessary waste. Addressing the issue promptly can prevent further damage and conserve water. This guide provides a clear, step-by-step approach to repairing a standard kitchen faucet, focusing on the tools required, common causes of leaks, and the repair process itself. Whether you’re a seasoned DIY enthusiast or a beginner, these instructions aim to equip you with the knowledge to tackle this common household task.
Before beginning any repair, it is essential to understand the type of faucet you have, as mechanisms vary. This guide focuses on compression faucets, which are common in many kitchens and typically have separate hot and cold handles. However, the general principles can be applied to similar models. Always ensure safety by turning off the water supply before starting any work, and gather the necessary tools to facilitate a smooth process. The following sections will outline the common causes of leaks, the tools you’ll need, and a detailed repair procedure.
Common Causes of a Leaky Faucet
A leaky faucet can originate from several internal issues. The most frequent culprit is a worn-out washer, which is a small rubber or neoprene ring that seals the valve seat when the faucet is turned off. Over time, constant pressure and friction cause the washer to deteriorate, leading to drips. Another common cause is a damaged O-ring, which is a smaller rubber ring that seals the base of the faucet handle. If the leak occurs around the handle’s base, the O-ring is likely the issue. Additionally, a corroded valve seat—the connection between the faucet and the spout—can prevent proper sealing, resulting in leaks. Corrosion can be caused by mineral deposits in water, which gradually eat away at the metal. Identifying these parts is the first step toward an effective repair.
Tools and Materials Needed
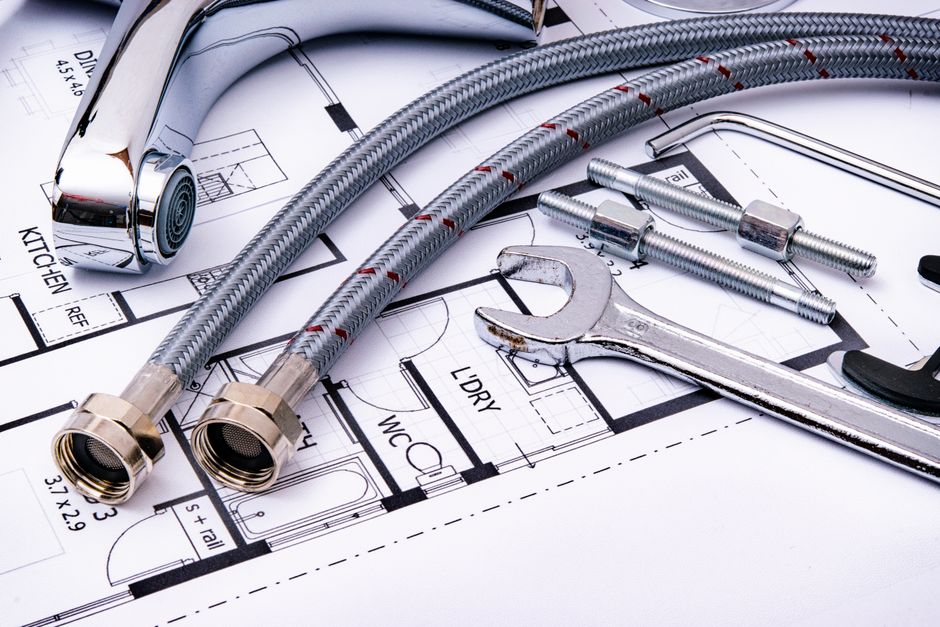
To successfully repair a leaky faucet, you will need a few basic tools and materials. Most of these are common household items, but if you don’t have them, they are readily available at local hardware stores. Essential tools include an adjustable wrench, which is used to loosen and tighten nuts; a screwdriver set (both flathead and Phillips) to remove handle screws; and pliers, which can be helpful for gripping small parts. In addition, you may need a basin wrench for accessing hard-to-reach nuts under the sink. As for materials, having replacement parts on hand is crucial. These include new washers of the correct size, O-rings, and possibly a new valve seat if the old one is corroded. It is also advisable to have plumber’s grease, which lubricates the O-rings and ensures a proper seal, and thread tape to ensure leak-proof connections. Finally, keep a cloth or rag handy to clean up any water that may spill during the process.
Step-by-Step Repair Process
Before starting, turn off the water supply to the faucet. There are typically shut-off valves located under the sink. Close both the hot and cold water valves, then open the faucet to release any remaining water in the lines. This step prevents water from spraying out when you disassemble the faucet. Once the water is off and the lines are drained, you can proceed with the repair.
The first step is to remove the handle. Use a screwdriver to remove the screw that secures the handle to the stem. On some models, the screw may be hidden under a decorative cap that you can pry off with a flathead screwdriver. After removing the screw, gently pull the handle upward to detach it. If it sticks, you can gently tap it with a wrench to loosen it, but be careful not to damage the finish.
With the handle removed, you will see the bonnet nut—a decorative nut that holds the stem in place. Use an adjustable wrench to turn the bonnet nut counterclockwise and remove it. Once the nut is off, you can lift out the stem assembly. This may require some tugging, as it may be snug from the packing or O-rings. Alternatively, some faucets have a cartridge or a ball-shaped valve; these are less common in compression faucets but may appear in newer models. For a compression faucet, you will now see the stem, which has a rubber washer at its base.
Inspect the washer for wear or damage. If it is cracked, misshapen, or hardened, replace it. Remove the screw that holds the washer in place, and install the new washer, ensuring it fits snugly. While the stem is out, also check the valve seat for corrosion. If it looks worn, you may need to replace it. The valve seat can be removed with a special seat wrench or by replacing the entire faucet if it is integral. If the seat is not easily removable, you can use a seat dressing tool to smooth out minor corrosion. However, for extensive corrosion, replacement is advised.
Now, apply a small amount of plumber’s grease to the new O-ring and the packing around the stem. This lubricant helps the parts move smoothly and creates a better seal. Reassemble the faucet by placing the stem back into the faucet body, tightening the bonnet nut with an adjustable wrench. Do not overtighten, as this can strip threads or crack parts. Replace the handle and secure it with the screw.
Turn the water supply back on slowly. Check for leaks by running the water and inspecting the handle base and spout. If you see drips, you may need to tighten the bonnet nut slightly or check that all parts are properly aligned. It is also a good time to clean the aerator, which is the small screen at the spout tip, if you notice reduced water pressure. This is not directly related to leaks but can improve water flow.
Preventive Maintenance and Additional Tips
To minimize the frequency of leaks, regular maintenance is beneficial. Periodically check the washers and O-rings for wear, especially if your water is hard, which can accelerate deterioration. Cleaning the faucet with a mild solution can prevent mineral buildup on the spout and handles. Also, avoid excessive force when turning handles, as this can damage internal components. If a leak persists after repair, it may indicate a deeper issue, such as a cracked valve body or a problem with the water pressure. In such cases, consulting a professional plumber is advisable, as they can diagnose and fix complex issues. However, for many standard faucets, this DIY repair is straightforward and cost-effective, saving you both water and money.
It is also wise to consider upgrading older faucets with modern models that use ceramic disc valves, which are more durable and less prone to leaks. Such faucets may require different repair techniques, but the basic principles of shutting off water and replacing parts still apply. When selecting replacement parts, ensure they match your faucet model, as dimensions can vary. Keeping the instruction manual or manufacturer details handy can be helpful.
Remember: Always turn off the water supply before attempting any faucet repair. If you are unsure about the process or encounter complications, do not hesitate to seek professional help.
By following these instructions, you can address a leaky faucet effectively. The key is to identify the cause, use the correct tools, and take your time during the repair. With a systematic approach, you can restore your faucet to proper working order and enjoy a quiet, drip-free kitchen.